Working with Sage 200 windows
When using drop-down lists you can:
-
Refine your search.
Enter the first characters of the information that you want to find. The first item in the list, using those characters, is highlighted.
-
Sort columns in ascending or descending order.
Click on a column heading to sort the information alphabetically or numerically. Click the column heading again to sort in reverse order.
- If you are using the keyboard, press F4 to display the list and press Enter to select an item.
Windows, such as journal entry or invoice entry, allow you to enter several transaction lines.
- To add a line, click in the blank space of a list area.
- To delete the selected line, click Delete (if available).
- To delete all the lines, click Clear.
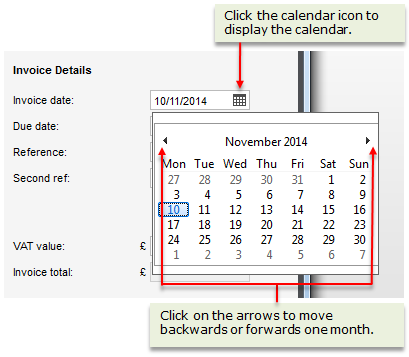
Date boxes have a calendar display for you to pick a date entry.
In most cases, Sage 200 will automatically enter today's date in a date box.
To enter a different date:
You can use the Find option to search for data displayed in lists in Sage 200 windows. There are two types of Find option, depending on the type of data in the list.
You can:
-
Click the Find button or right-click on a column and select Find.
- Enter a the value to search for in the Find box.
- Use the In column drop-down list to select a column to search.
-
Select the search criteria from the Match drop-down list:
- To start the search, click Find First. This finds the first occurrence in the data. If there is more than one occurrence, you can scan through the other search results.
- To find the next match, click Find Next.
-
Click the Find button or right-click on a column and select Find.
- Enter a the value to search for in the Find box.
- Use the In column drop-down list to select a column to search.
-
Select the search criteria from the Match drop-down list:
- Select Any to look for the value entered anywhere in the search field.
- Select Start to look for the value entered at the start of the search field.
- Select Whole to look for fields that match the value exactly.
- To start the search, click Apply Filter. This finds all the data that matches the search criteria.
- To narrow down your results, apply another filter. Enter the search criteria and click Apply Filter. This finds all the data that matches the search criteria in the filtered list.
- To remove all the filters and return to the unfiltered list, Clear Filters.
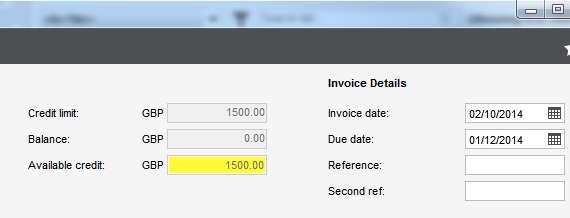
As you work in Sage 200, you may receive warning or error messages. The box will be highlighted in red or yellow.
-
A yellow box indicates a warning.
These messages warn you of a situation where you can continue, but may not want to. For example, a customer being over their credit limit.
When you click Save, you will be prompted to confirm that you want to continue even though the account has exceeded the credit limit.
-
A red box indicates an error.
These messages tell you of a problem with information you are entering, such as an account which doesn't exist. You cannot continue until you change the information in the box.
If the warning relates to errors in your data you should resolve these errors as soon as possible to prevent the problem occurring elsewhere in Sage 200.
If you are unable to resolve the problem, contact your Business Partner for further assistance. Before contacting them you should make sure that you have the following details:
- Error number (if available).
- Error message.
- Details about the routine where you are experiencing the problem. For example, Sales Ledger > Account Details.
-
The version number of Sage 200 that you are using.
To view the version number, select
 Tools > About Sage 200.


